Trying needs-you: the install guide
Thanks for trying needs-you before it's public. This page is everything you need: getting access, installing the Mac app, connecting a machine, what to try, and how to tell us what went wrong. It takes about 15 minutes, plus a few more per extra machine.
What it is. One inbox for "you have to do something". AI agents (Claude Code), servers, cron jobs and CI post a short item when they're blocked on you; your Mac shows it in a small floating pill with a link to where you act, and it goes away once it's handled.
Words used on this page:
| Word | Means |
|---|---|
| Pill | The small floating panel the app shows at the top right of the screen. It never takes keyboard focus. |
| Hub | The little service that stores items (Python + SQLite). The Mac app runs one for you; nothing to install. |
| Sender | Any machine or agent that posts items, with the needs-you command-line tool (the CLI). It doesn't need the Mac app. |
| Invite link | A link the app makes (Settings → Connect a machine) that sets up one or more senders. Each machine gets its own revocable token. |
| Tailnet | Your private Tailscale network. Only needed if machines other than the Mac should post. |
The rest (reader, owner, server hub): Words.
What you need #
- A Mac with macOS 14 or later (Apple silicon or Intel).
- Apple's Command Line Tools, for
/usr/bin/python3(the hub runs on it). Check in Terminal:xcode-select -pprints a path if they're installed. If not, the app tells you; install them withxcode-select --install. - Optional: Claude Code on the Mac, for "agent is waiting" cards.
- Optional: a second machine (a Linux server or VM, or another Mac) and Tailscale on both, to test a remote sender.
1. Get the app #
The project is public: download the latest build from the Releases page, or from Terminal with the GitHub CLI:
gh release download --repo tayharris/needs-you --pattern 'NeedsYou-*.dmg' --pattern SHA256SUMSTo report problems you'll need a GitHub account (section 8); otherwise send them to whoever invited you.
2. Download and check #
Download NeedsYou-X.Y.Z.dmg from the release (the NeedsYou-X.Y.Z-macos.zip is the same app). Optionally download SHA256SUMS too and check the file wasn't damaged on the way:
cd ~/Downloads
shasum -a 256 -c SHA256SUMS --ignore-missing     # the DMG's line should say OK
Ignore the other assets (needs-you-server-…, needs-you-cli-…, release-manifest.json): they're for servers and for the app's updater.
3. Install and first launch #
- Open the DMG and drag
NeedsYou.apponto the Applications link in the same window. Eject the DMG. - Open
NeedsYou.appfrom Applications. The app is ad-hoc signed, not notarized (there's no paid Apple Developer ID yet), so macOS blocks the first launch once:- macOS 15 and later: macOS says it can't verify that "NeedsYou" is free of malware. Click Done (not Move to Trash). Open System Settings → Privacy & Security, scroll down to the Security section, where it says "NeedsYou" was blocked, click Open Anyway, then confirm with Open Anyway and your password or Touch ID.
- macOS 14: right-click (or Control-click) the app → Open, then Open in the dialog.
- Either version, from Terminal:
xattr -dr com.apple.quarantine /Applications/NeedsYou.app, then open it normally.
- Work Macs with endpoint security (SentinelOne, CrowdStrike, Jamf Protect and the like) may flag or kill an ad-hoc signed app that listens on a port. If that happens, note the product and its message for your report; don't fight your IT department over it.
What you should see: no Dock icon and no window. A faint pill appears at the top right of the screen. That's the idle state ("nothing needs you"):

It's an accessory app: it lives in that pill (and, optionally, a menu bar icon), and you reach everything by right-clicking the pill: Settings…, About Needs You, Quit Needs You.
4. Check the hub on this Mac (Your inbox) #
The hub starts by itself (Run hub on this Mac is on by default). Check it:
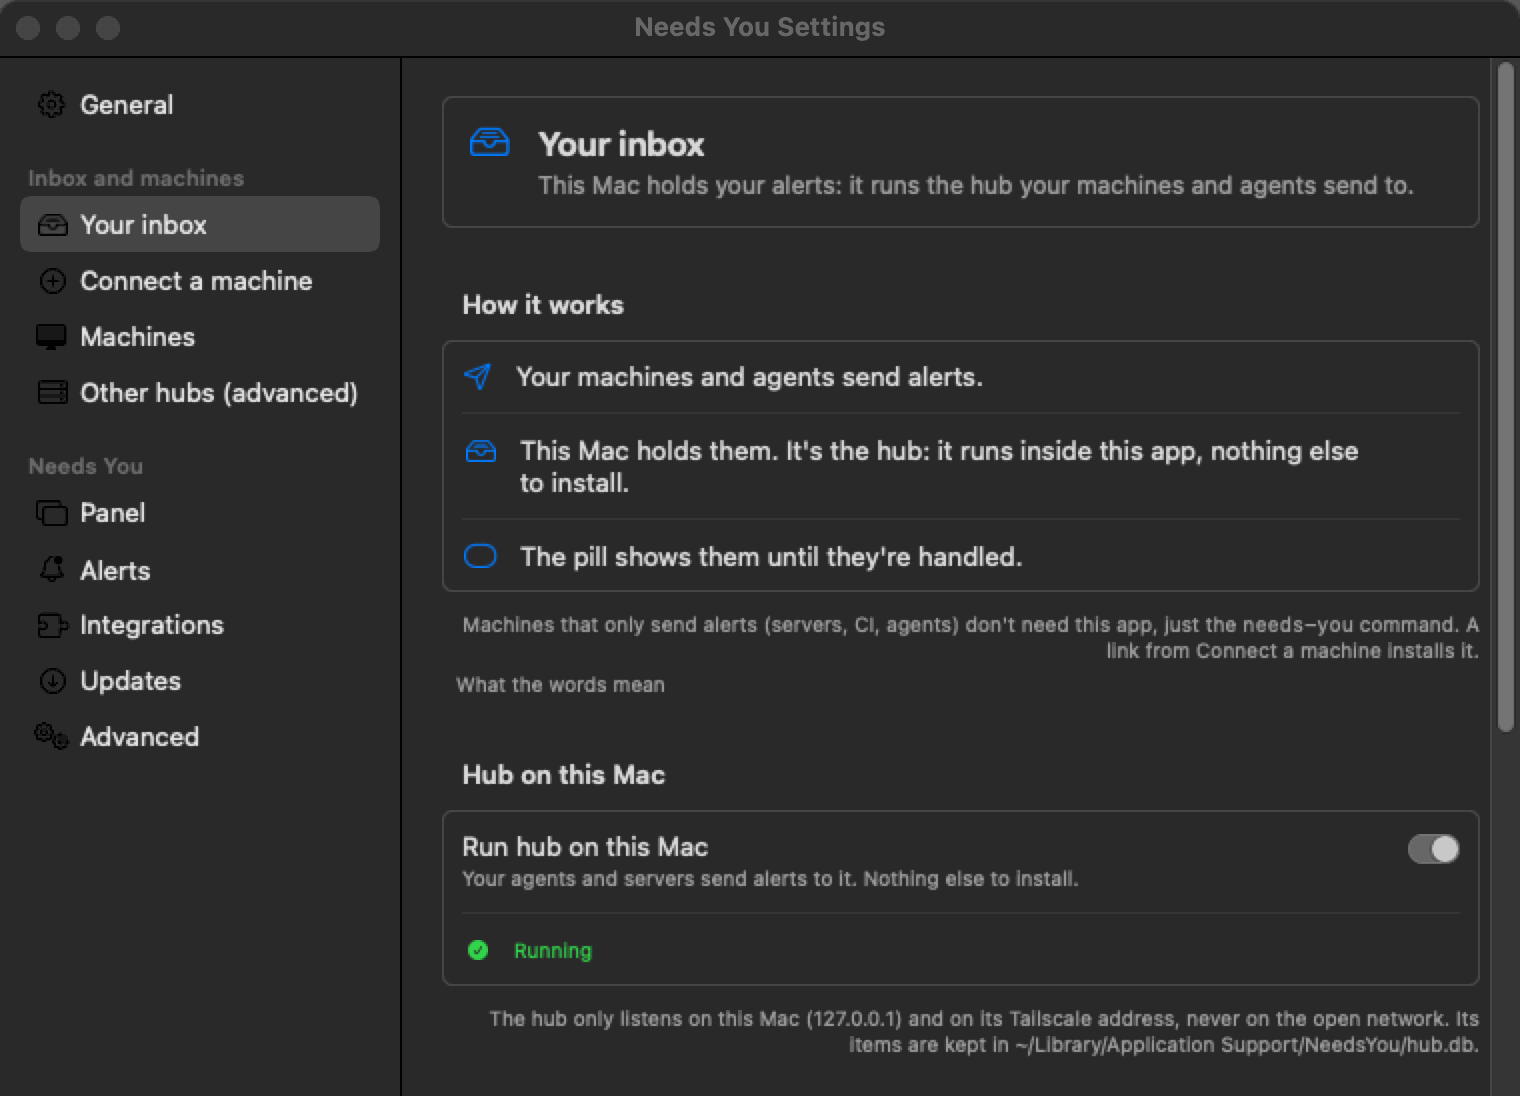
- Right-click the pill → Settings…. Settings is a sidebar of pages: General; under Inbox and machines: Your inbox, Connect a machine, Machines, Other hubs (advanced); then Panel, Alerts, Integrations, Updates, Advanced.
- Open Your inbox. It starts with how it works: your machines send alerts, this Mac holds them (it's the hub), the pill shows them. Run hub on this Mac is on and says Running. Below it are two addresses: On this Mac (
http://127.0.0.1:8765, for agents on this Mac) and, if Tailscale is up, From your other machines (Tailscale) (http://<your-mac>.<tailnet>.ts.net:8765). - Optional: General → Open at login.
If the pill says Hub can't start (click it to open Settings):
| Your inbox says | Fix |
|---|---|
| Python 3 isn't available on this Mac | Run xcode-select --install in Terminal and let it finish (a few minutes). Then right-click the pill → Quit Needs You and open the app again. |
| Port 8765 is already in use by another program | Another copy of Needs You (in another user account, or one you built) or another program holds port 8765. Quit it, then quit and reopen this one. |
If it says Hub not answering, the hub started but hasn't answered for 30 seconds. Click the pill: the card there has Restart hub (so does Your inbox, with the hub's last output). If it keeps happening, quit and reopen the app, and send the output of log show --last 10m --predicate 'subsystem == "app.needsyou.mac"' with your report.
Only want to look around? General → Demo mode shows sample items without a hub. Turn it off again before section 6.
5. Tailscale, or not? #
| You want alerts from | You need |
|---|---|
| Claude Code and scripts on this Mac only | Nothing more. Agents on the Mac post to 127.0.0.1. |
| Other machines (a server, a VM, another laptop) | Tailscale on the Mac and on each machine, signed in to the same account, with MagicDNS on (the default). The hub then listens on the Mac's tailnet address by itself; there's no switch. Setup and checks: Tailscale. |
| Another machine, without Tailscale | An SSH tunnel from the Mac works: Tailscale → A machine without Tailscale. |
The hub never listens on your Wi-Fi or the open internet, only on 127.0.0.1 and the tailnet address.
The first time another machine connects, macOS may ask whether python3 may accept incoming connections. That's the app's hub: click Allow. (It can ask again after an update.)
6. Connect a machine: an invite link and the one-line setup #
Do this for the Mac itself first (so Claude Code on the Mac can post), then for each other machine.
Right-click the pill → Settings… → Connect a machine (under Inbox and machines).
What is it? A server or agent that sends alerts. Machine name: anything, e.g.
laptopordevbox. Uses: how many machines this link should set up. Expires after: keep the default.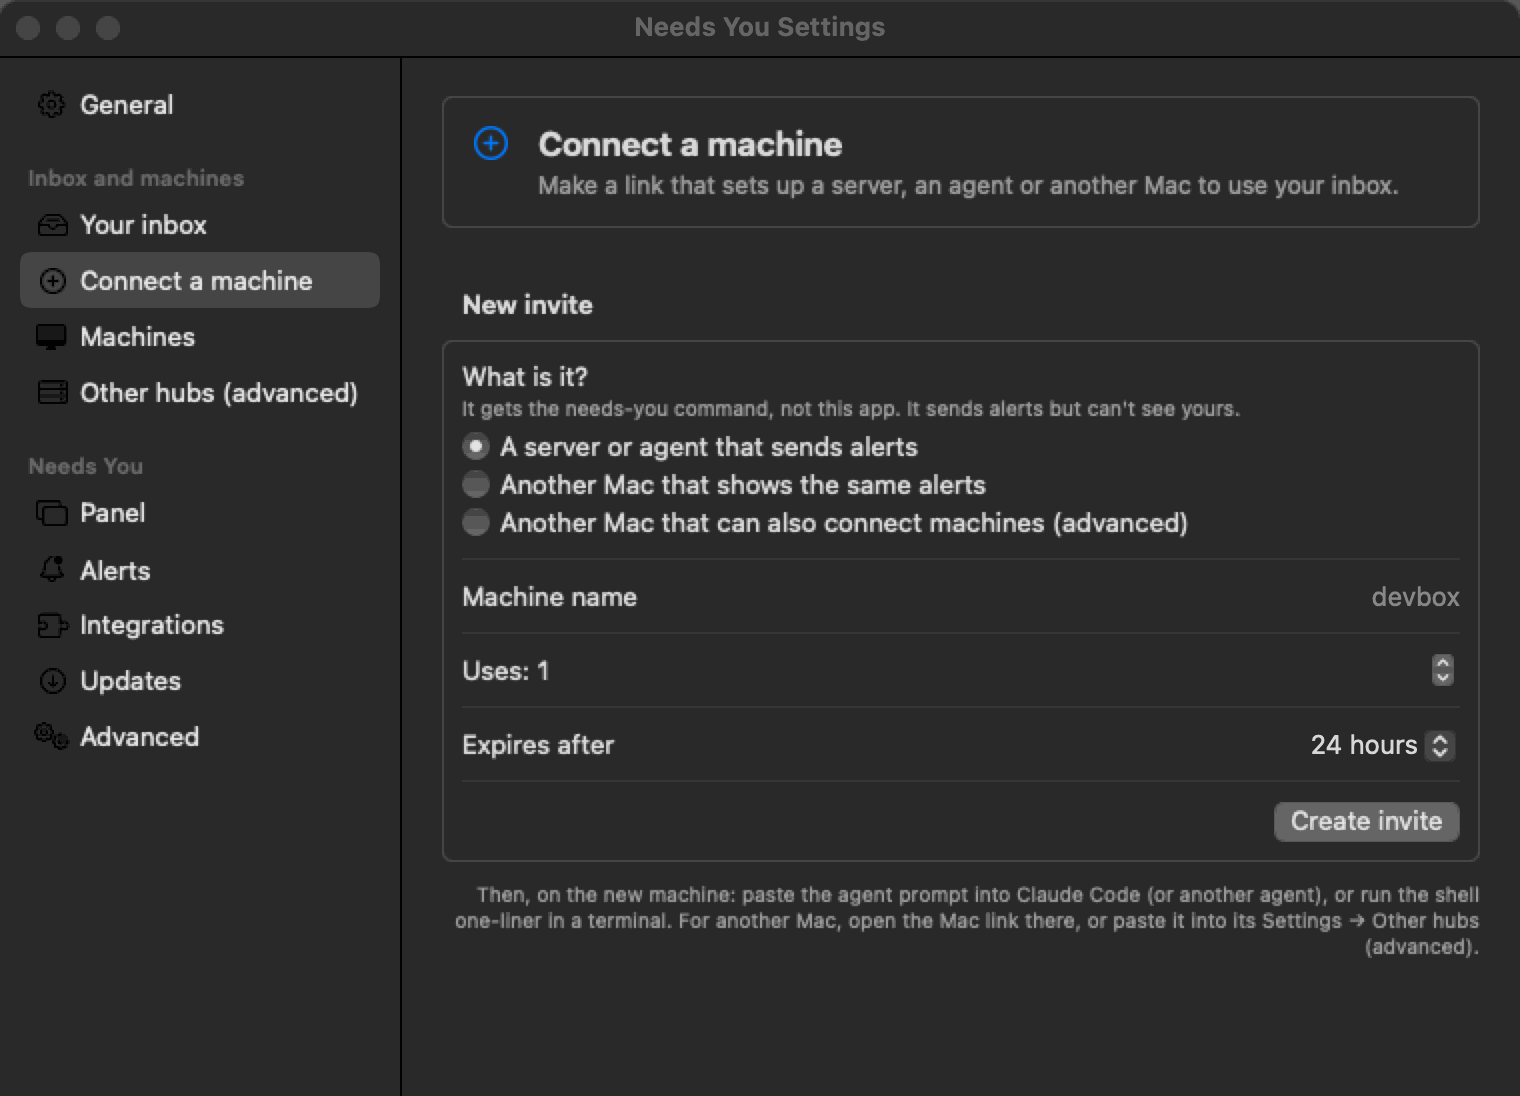
Click Create invite. The join link appears with two copy buttons:
Shell one-liner copies a command to run on the machine:
curl -fsSL <join_url>/install.sh | bash -s -- --yes --claude-hooks user --skill --alertsAgent prompt copies a sentence to paste into Claude Code on that machine instead; the agent reads the link and runs the same installer.
On the machine (the Mac itself, or a server over SSH), paste and run the one-liner. It takes a few seconds and needs only
bash,curlandpython33.9+, which macOS and Ubuntu 22.04+ have. Everything goes under your home directory:- the
needs-youCLI in~/.local/bin, and one line tagged# added by needs-youin your shell profile that puts it onPATH; - a token of the machine's own in
~/.config/needs-you/env(mode 600; never paste this file); - a 5-minute
needs-you flush(a LaunchAgent on macOS, a crontab line on Linux) that delivers items queued while the Mac was asleep; - with the options in the line: the Claude Code hooks (
--claude-hooks user), the needs-you skill for Claude (--skill), and alerts turned on for every Claude Code session on the machine (--alerts). Leave those three off on a machine without Claude Code. Every option: Add a sender.
- the
A test card (
setup:<host>:test) appears under Recent in the open panel (click the pill to open it).Open a new terminal tab (so
PATHis updated) and runneeds-you doctor. Every line should beOKorINFO; eachWARNorFAILhas its fix under it.Restart open Claude Code sessions so they load the hooks.
Re-running the line on the same machine is safe: it keeps the token and doesn't spend a use. Uninstall: the same line with --uninstall instead of the other options (while the link hasn't expired).
7. What to try #
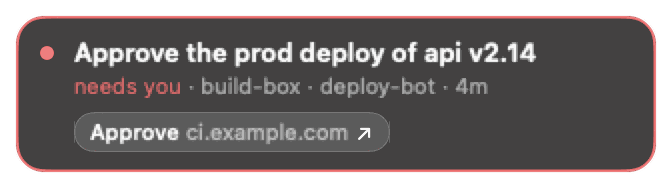
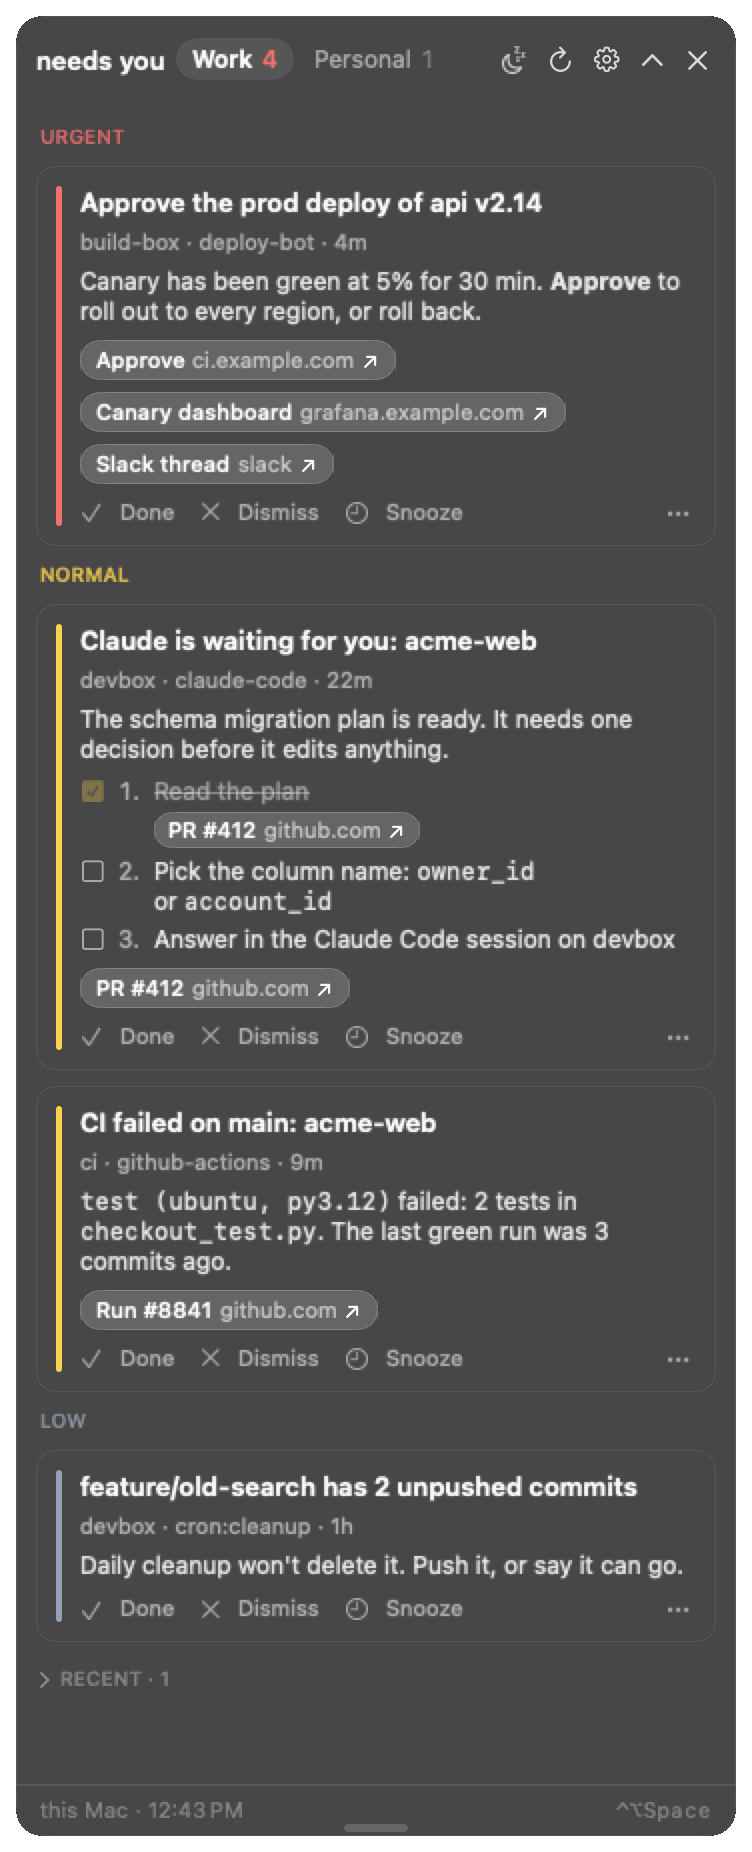
Tick off what you get to; anything that surprises you is worth a report. With a few items waiting, the pill shows a count, a new one springs out for a moment, and a click opens the cards (these are example items):
Post and resolve an item from a connected machine:
needs-you add --key "personal:test:hello" --context personal --title "Say hi back"
needs-you resolve --key "personal:test:hello"
The pill springs out with the title, then goes back to idle after the resolve.
Re-post the same key with a different title: the card updates instead of duplicating.
Claude Code: in a Claude Code session on a connected machine, ask for something that needs a permission prompt (e.g. "run
lsin a new folder"). A card "Claude wants to run …" appears; once you answer in Claude, it clears itself. Leave a session idle waiting for input for about a minute: "Claude is waiting for you".Card buttons: Done, Dismiss, snooze, and the Terminal / VS Code buttons on agent cards (Claude Code everywhere).
Never steals focus: keep typing in another app while cards arrive. Not a single keystroke should go to the pill. If one does, that's the most important bug you can report.
Work and personal: post one item with
--context workand one with--context personal. Outside work hours (weekdays 7:00–18:00) the work item shows only as the faint second number.Focus and snooze: right-click the pill → Focus (Agents and urgent only, Urgent only, Everything later) and Snooze.
Make it yours: Settings → Panel (size, card text, opacity, shortcut) and Alerts (how loud). Control-Option-Space (⌃⌥Space) opens or collapses the card list.
Mac asleep or app quit: quit Needs You, post from another machine (the CLI says it queued and exits 0), reopen the app. The item arrives within about 5 minutes.
Machines: Settings → Machines → Refresh lists your machines (names, what they are and CLI versions, never tokens). Revoke one; on that machine
needs-you add …is now refused.Updates: Settings → Updates shows the version and the last check. It checks GitHub Releases on its own (no login needed) and only installs published releases, never drafts.
More on everything: Mac app, Claude Code everywhere, Troubleshooting.
8. Report a problem #
Collaborators: open a new issue and pick Tester report. It asks for the details below. Everyone else: send the same details to the owner.
Please include:
macOS version (Apple menu → About This Mac), Apple silicon or Intel, and whether it's a managed work Mac.
App version: right-click the pill → About Needs You. Or in Terminal:
defaults read /Applications/NeedsYou.app/Contents/Info.plist CFBundleShortVersionString.What you did, what you expected, what happened. Screenshots of the pill or Settings help (crop out item text you'd rather not share).
Your setup: hub on this Mac or not, Tailscale or not, which machines you connected and how (one-liner or agent prompt).
On a sender: the output of
needs-you doctor(it never prints the token).The app's log from the last hour. This saves it to your Desktop with invite codes, tokens, tailnet names and tailnet addresses masked:
log show --info --last 1h --style compact --predicate 'subsystem == "app.needsyou.mac"' |
  sed -E 's/nyi?_[A-Za-z0-9_-]+/<redacted>/g; s/[A-Za-z0-9-]+\.[A-Za-z0-9-]+\.ts\.net/<host>.<tailnet>.ts.net/g; s/100\.[0-9]+\.[0-9]+\.[0-9]+/100.x.x.x/g' \
  > ~/Desktop/needs-you-log.txt
Skim it before attaching; it should hold nothing private, but you're the judge. Info lines don't stay in the log long, so run it soon after the problem. For a problem you can repeat, record it live instead: run
log stream --info --style compact --predicate 'subsystem == "app.needsyou.mac"'(piped through the samesed), reproduce, then press Ctrl-C.
Never paste a token (ny_…), an invite link or code (nyi_…, /join/…), or the contents of ~/.config/needs-you/env or ~/Library/Application Support/NeedsYou/. If one slips into an issue, tell the owner: revoking it takes a click in Settings → Access.
Security problems: don't open an issue; tell the owner directly (SECURITY.md).
9. Remove it #
On each sender: run the invite's one-liner with
--uninstallwhile the link is still valid, or remove things by hand (Add a sender → Removing a sender).On the Mac: right-click the pill → Quit Needs You, then:
rm -rf /Applications/NeedsYou.app ~/Library/Application\ Support/NeedsYou
defaults delete app.needsyou.mac
If you turned on Open at login, turn it off first (General), or remove it in System Settings → General → Login Items.
This page is docs/guides/testers.md in the repo. View or edit it on GitHub.